Hope everyone had a good weekend! The weather here has been so nice – 80 degrees on the coast. Seemed crazy to be using our flip flops and sunscreen in January, but use them we did! Leaves on a lot of the trees have turned and are falling too. Guess San Diego decided to have summer and fall all at once for a weekend! Anyway – more on our weekend later…

For now, a little scrapbooking. I’m going to attempt to keep up with Project Life Tuesday on The Mom Creative this year. I was keeping up with my girls’ PL albums so great until baby #3 came along and haven’t done much since. Time to kick it in gear and hopefully catch up on their albums! Some of you have asked me if I’m ordering Becky’s new PL albums and the answer is yes, but I want to finish my other albums for my girls first. I’ll order one for Kole too and start his PL album when he turns one. (Love that Becky created two album choices this year – works great for the way I use them for my individual kids.) If you are new to my blog (hello and welcome!) you can see how I scrapbook for my kids under the Project Life links at the side of my blog under popular posts.
I had great expectations of getting so much done on Addison’s book last week. And then realized that I have three kids now and great expectations are just that. :) So I’m sharing what I did accomplish which was basically just all the prep work. Crossing my fingers I’ll find a minute to work on her book this week.
First I cleaned off my scrap space. It was a mess. Again.
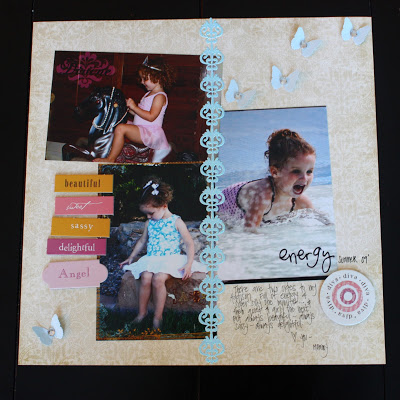
Then I did a quick layout for Addison’s book. And by quick I mean this took me ten minutes and now it’s bugging me because it looks like I spent ten minutes on it and I know it would look better if I would have spent thirty.
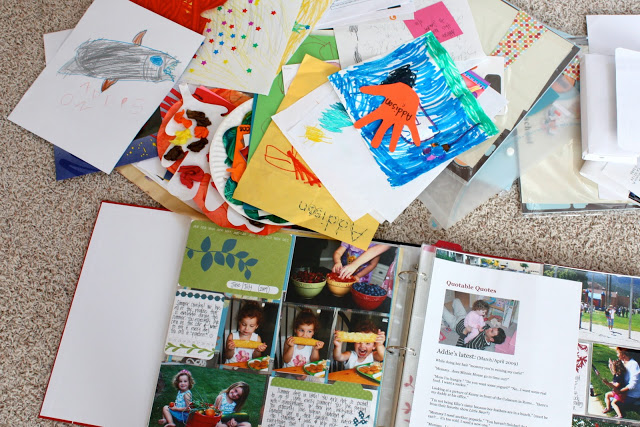
I got the next set of pictures developed and started going through her school work to see what I want to include in her album.
And that’s as far as I got. :)
I also wanted to share a quick tip several of you have asked about. This is helpful for any of you doing Project Life, or if you have Photoshop and would like to know how to develop two vertical 4×3 pictures as one 4×6 like I did with the snowman picture of Kole for my holiday tags.
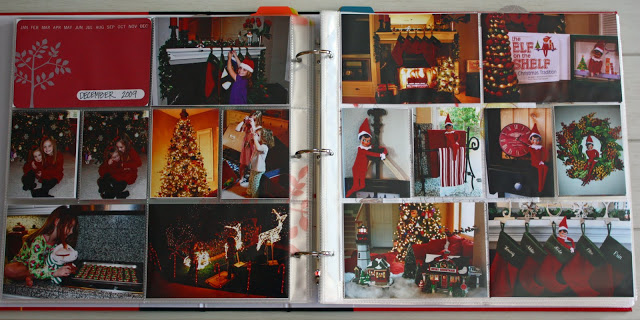
I use a lot of 4×3’s for Project Life and it’s so easy to do. (middle section of this spread are all 4×3’s) If you have downloaded Picasa, you can simply collage two vertical photos and save it as a 4×6 to develop. If you want to do this in Photoshop, follow these instructions:
Start by creating a 4×6 document. File>New>Blank file. Then a screen will pop up with some options for you to choose. Select 4 for height, 6 for width and 300dpi for resolution and RGB for color. Then you’ll see a blank white screen.
Now open the two photos you want to collage in Photoshop (file>open>select for each picture).
Select one of the photos so that it’s showing big on your computer screen. (The blank file and other picture are now at the bottom in your photo bin.)
At the top of your screen under the menu bar leave the Aspect Ratio alone, but change the width to 3 and the height to 4. Keep the Resolution at 300 pixels/inch. Crop your picture how you want it to look (using the crop tool on the sidebar). Then select the other picture from the photo bin and crop it exactly how you want it.
Once you have cropped both pictures then select your new file so it’s showing big on your computer screen. Then select your move tool on the sidebar (looks like a plus sign with a triangle pointing to it). Use your move tool to select each picture from the bottom photo bin and place it on your new file (click and drag). Move them around until they fit perfectly next to each other filling the blank file.
Now this step is important. On the right side you will see the layers menu. You can see your right picture on one layer and the background white layer and the left picture – all separate layers at this point. At the top menu bar, select Layer>Flatten Image. The layers menu will put all 3 layers into one layer. (your picture doesn’t change)
Now save your new picture. File>Save As> (name your picture and make sure it is saved as a jpeg so you can print it).
If you wanted to do a collage with more pictures, just change the cropping sizes but do everything else the same.
I know that seems like a lot of directions, but it’s really so quick and easy once you’ve done it a few times. Hope that helps!
Happy Scrapping everyone! :)
xoxo, Erin


Thanks for the instructions! It was nice to see PL in action–I started a blog and am using the digital version to capture our year to give me a little break from scrapbooking and an opportunity to get to know my Canon a little better too–I like the kit, so maybe that is an option for the future. Definitely something to consider…thanks!
Thanks for the Photoshop tutorial :) Love your site and your kiddos are precious :)
Your craft area is so colorful and cute. Love it.
Thank you, thank you!!! I have been waiting for this post. Is it wrong that I am counting the minutes until nap time so I have time to play with photoshop?
Last year I used the kit for my daughters scrapbook. This year I am doing a family book and then using a kit to try to do the picture of the day. We’ll see if I can keep up with both.
I have 2 kids and want one more baby, but wonder how I will ever find time to scrapbook. Good for you for keeping up!
I have 4 kids, the oldest is 13 and I haven’t scrapbooked since she was 6 months old. YIKES! I am severely behind! I noticed on this post that it lookes like you have 12X12 pages that have 6 picture pockets in them? Where do you find those? I have looked but can never find, and the only way I am ever going to catch up on scrapbooking is to use something like that. Please let me know, when you have time. [email protected]
Love reading your blog!
The new year always makes me want to scrapbook. Now, to find the time with 3 little kiddos.
I did buy PL, but not sure how I am going to use it yet. I better decide before January is over, though.
:)
love what you are doing. your photo’s are awesome. great craft space. thanks for the instructions on photo editing.
You’re a rocket scientist, you know that? Underneath all the cute, curled hair is some really smart brains. :)
You rock! Maybe it is possible for me to switch from Picasa to Photoshop! By the way, do you have Photoshop Elements? Love your book – it looks great.
I am completely envious of the fact that it’s 80 degrees where you are! I am so ready for summer!
I purchased PL after seeing it on your blog. I love how you have one for each of the girls! I started putting it together this weekend and am loving it!!! I’m so glad to see your additional inspiration and the tip about putting 2 pictures together for the smaller slots.
You scrapbook space is absolutely fantastic! I’m jealous!
Thanks so much for the 4×3 instructions…I use Picasa and make collages, but wasn’t sure how to print a 4×3 photo.
Love how you’re using the PL for your children….mine are 18 and 15 and I still have 1000’s of pictures in boxes…gasp…
Erin, I just finished my 1st PL album, and love it! I can’t believe i did it because I’n NOT a scrap booker! PL made it so easy. I’m going to try the online version this year.
Love the pictures of Kole in your Moms sink :)
Hi Erin,
I’m so excited that your doing PL again or at least finishing up the girls. I’ve missed seeing them but love reading your blog. Your scrap space is so cute, I’m redoing my space and want something like this. When Becky came out with both kits this year I thought of you right away and how perfect they’d be for your three. Happy Tuesday!
Hey, thanks for the instructions — now I’m feeling motivated to get out the photos and start scrap’n :)
Acutally, I did all of the Summer and Fall of 2010 in a digital book just so the guilt of being so far behind would weigh on me less! The books are awesome, but….I really MISS the process of scrapbooking. Doing it via the internet with digitals just doesn’t feel the same to me. But on the flip side of that, I now have two complete books and did them all in just a few hours! I’ll admit…that does feel good :)
Oh, and I added your blog to my “blog roll” …under the title: Organizational Wonders/Decorating Geniuses (of course!)
Is Chula Vista far from you? My hubby is painting a house down there this week :)
I am in the mood to scrapbook again, January does that to me every year! Your book looks great. Love the 4×3 idea.
I love reading even when it is a post that is way ‘over my head’. Your weather sounds so delightful. We were excited about our above freezing today!